Thule Hullavator Pro

Specifications:
- Load capacity: 75 lb
- Dimensions: 36 x 6 x 16 in
- Weight: 39.7 lb
- Length of straps: 2 x 9.5′
- Model number: 898
- Rubber cover for strap buckle
- Lockable
- Fits AeroBlade
- Fits Thule SquareBar
- Fits Thule Xsporter Pro
- One Key System compatible
Hey, it’s Paul with rackoutfitters.com, here to show you Thule 898 Hullavator Pro. This is a horizontal lift assist kayak carrier.
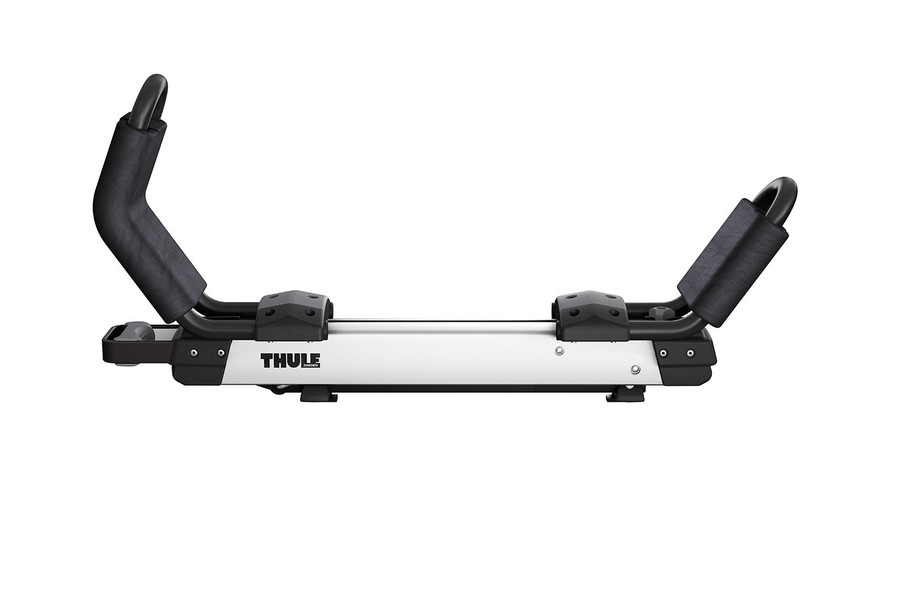
Here we have the arm assembly, to show you some of the details. The arm assembly contains the articulating arms that will lower the kayak 40 inches from the roof rack height. There’s also the gas strut, and the gas strut will help left a kayak and 40 pounds of its weight. So also we have here the kayak saddles. The saddles have rubber that helps to grip the kayak, as well as foam to help protect and cradle the kayak. The upper saddle is adjustable on the fly with a simple wingnut. It slides back and forth in a track. The lower cradle, it too can be adjusted by simply tightening or loosening these two fasteners.
So I’ll go ahead and take this arm assembly and show you how it attaches to the roof rack on the vehicle behind me.
So the roof rack system right now, we actually have two different bars. We have the Thule Square Bar, and then here we have the Thule AeroBlade bar. What’s not here is the Thule Xsporter truck rack, which the Hullavator also attaches to by attaching into the T-track, not unlike the AeroBlade bar, as it also attaches into the T-track. On the Square Bar, it has an under bar plate, and it attaches equally well on the Square Bar.
So to attach the arm assembly, here you’ll see there’s this chrome rod on the inside. That chrome rod needs to rest on the ledge of the bar frame. So to do that, we’ll just get it in alignment.
Next, we have a thru-pin, this quick release thru-pin, we just need to run through the aligned holes. Now you have the arm assembly attached to the base. So that is a very important feature, especially for people who need to reduce the overall height in order to get into a garage, you can simply remove that, the upper carrier, and increase your roof height quite a bit so you have a better profile to get inside of your garage.
Now, because it is so easy to take on and off, the unit can be locked, so Thule has a molded in lock housing. You can purchase lock cylinders. You would need two lock cylinders to lock the carrier, and here’s a sample of a lock cylinder. Lock cylinders are installed using a control key. Simply insert it, hold it with your finger. Remove that, it’s in place. Here you have an icon showing how to lock it. Just turn it to that horizontal position, and now, the release lever won’t allow it to release at all from the bar or even articulate up or down.
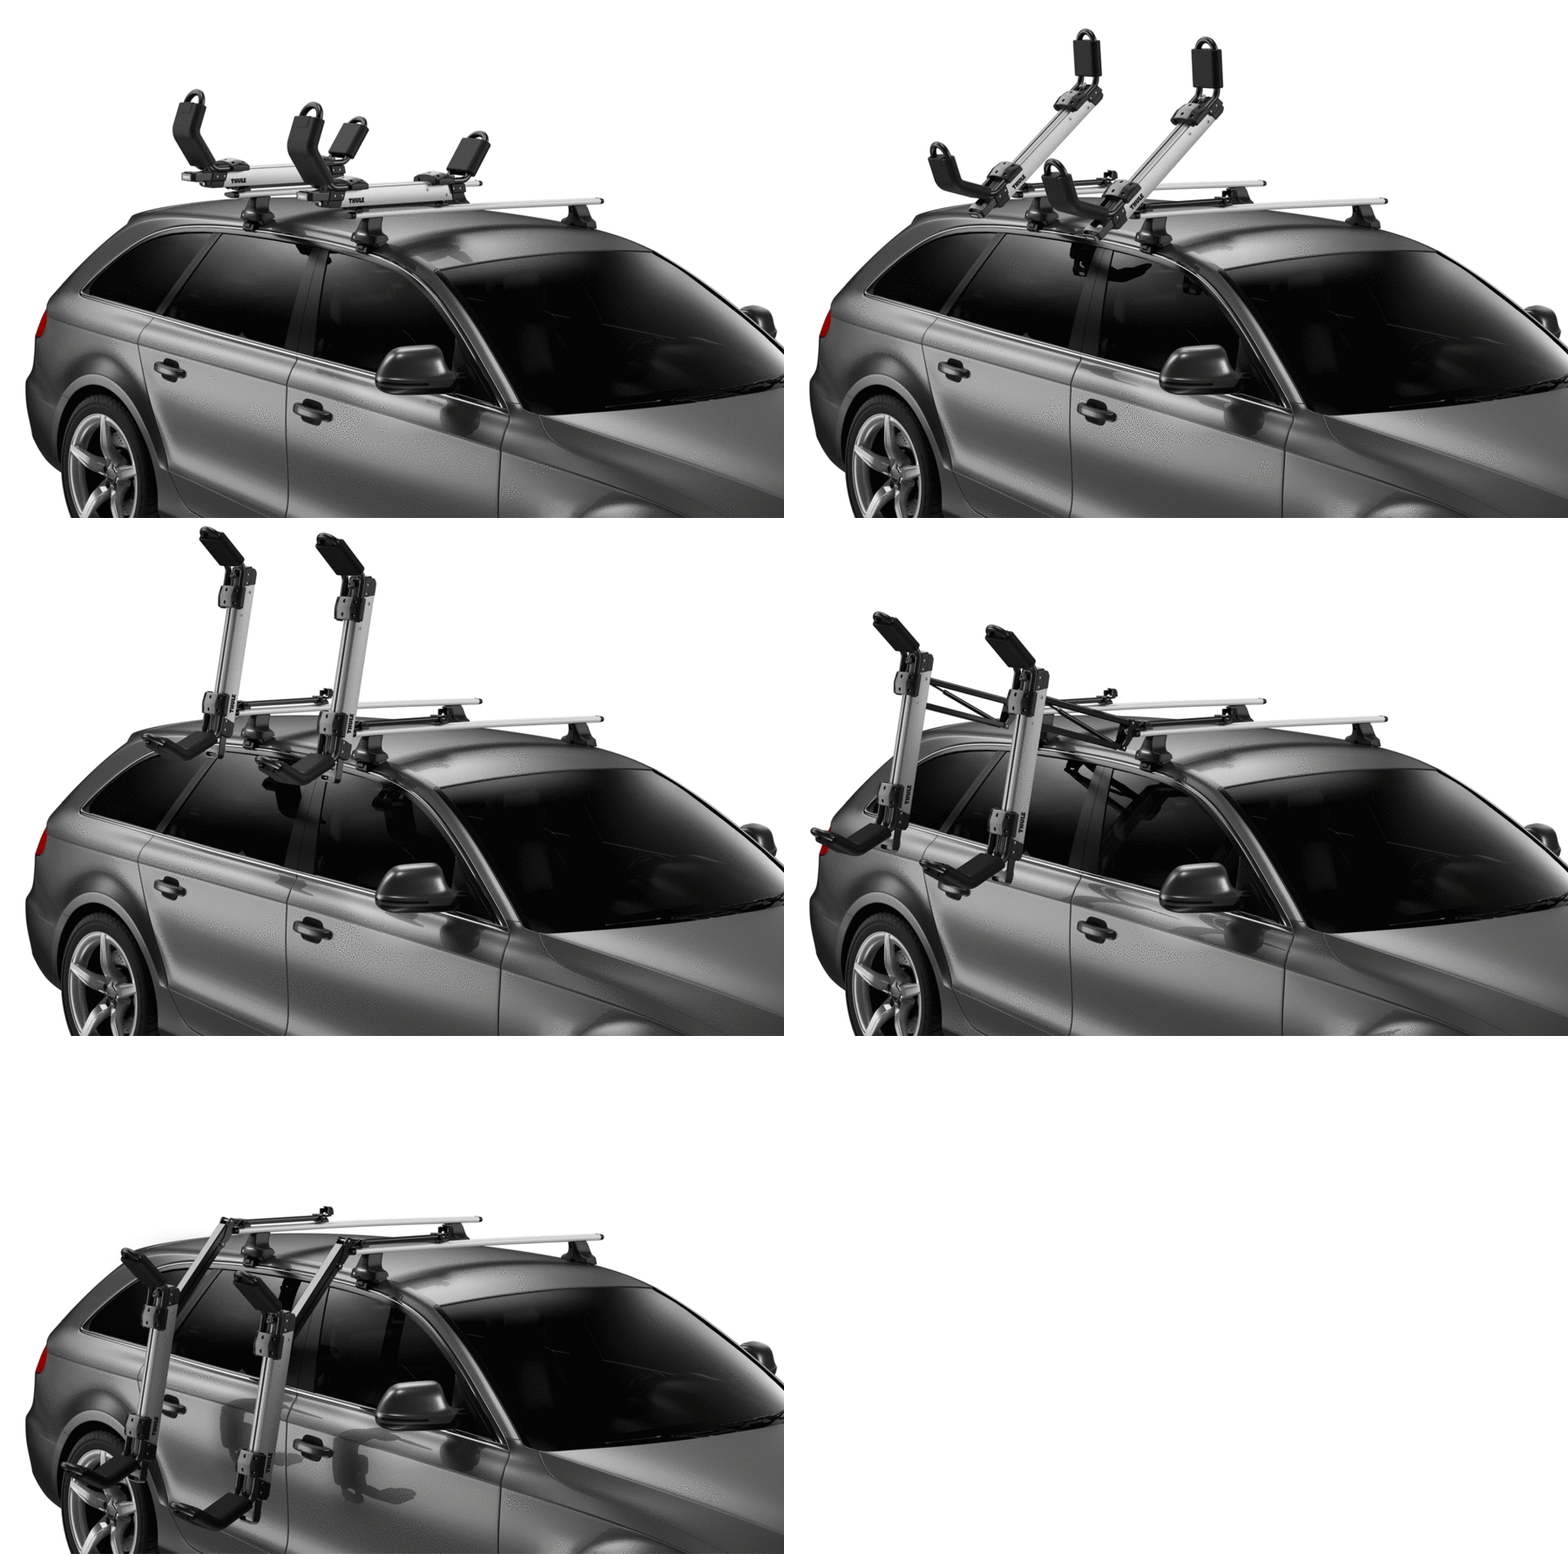
Okay, next we’re going to show how to actually load a kayak on the Hullavator. So to do it, what we want to do is just squeeze the release lever, bring it to the vertical position. You can do this one at a time. Once it’s in the vertical position, you can then squeeze it again, and then begin to pull it down. Now the motion is an out and down motion. So you bring it down until you hear and feel a click. Now it’s in place and it won’t come up on its own. Same thing here, press the release lever, pull out and down until it clicks. There’s your click. Now it’s ready to go ahead and load a kayak into place.
Important thing to know when you’re loading a kayak is that the kayak needs to be positioned where the weight is centered between the two cradles. So it’s not the length of the kayak but the weight of the kayak needs to be centered. That way, each gas strut is lifting the same amount of weight.
Now, Thule includes load straps, so those load straps can be run through the … are to be run through the lower upper and lower cradle assembly. Once you have it through there, then you can run the plain end of the strap through the cam buckle, through the back side of the cam buckle, and then pull out that slack, and the excess strap … let’s reposition this a little bit differently. The excess strap here, you can actually tuck into a compartment, and there’s a Velcro compartment that allows you to manage all that excess strap. Kind of a nice feature, nice little touch.
Okay, let’s do the same thing on the back. Run the plain end of the strap through the back of the cam buckle. Try to strategically position that so that you can just run that excess into that compartment there again. Okay.
So now we can go ahead and lift the kayak into place. To do that, we need to release the levers at the bottom and then pull upward and outward slightly. Once you have it started, you can actually release those levers and just guide it wherever you feel like you can get the best hold on the kayak.
Here you’re able to see the strength of those gas struts. This kayak happens to be about 35 pounds, so it’s able to lift this with ease, and so really it’s just basically doing the work all for you. If you have a heavier kayak, of course this can lift up to a 75 pound kayak, and so you’ll have to do a little bit more work on a heavier kayak.
So now the kayak is secured on the backside, and lastly what we want to do is secure the bow stern tie-down to the vehicle. I’ll just demonstrate with these. The front, Thule provides some premium bow stern tie-downs called QuickDraw. That just allows … puts some downward force on the front of the kayak in order to resist the strength of wind that exerts on the front of the boat.
So that’s all prepared now to go ahead and transport your kayak. I’ll go ahead and take it off so you can see how easily it allows you to lower your kayak. Basically it’s everything in reverse. What we want to do is just grab the levers, rotate it to that vertical position. With it in that position, we need to grab the levers again, and it’s an outward and downward movement.
So once I got it started, I can let go of those handles and just pull the kayak downward until you hear those two clicks. All right, now we can just go ahead and detach it, quick and easy. And kayak comes off at a very easy lift height, and lastly, we’ll go ahead and bring these back up into position, so you’ve gotta press that release lever, bring it up, rotate it down, press the lever, rotate it up, snap it down, lock them if you got them, and you’re ready to go.
Those are all the key features and benefits of the Thule 898 Hullavator Pro. I’m Paul with rackoutfitters.com, thanks very much for watching.


